
Meta Pixel Setup for Cross-Domain Tracking
Setup a single Meta Pixel across multiple domains, verify domains, add Conversions API, map events, and test to secure accurate attribution.
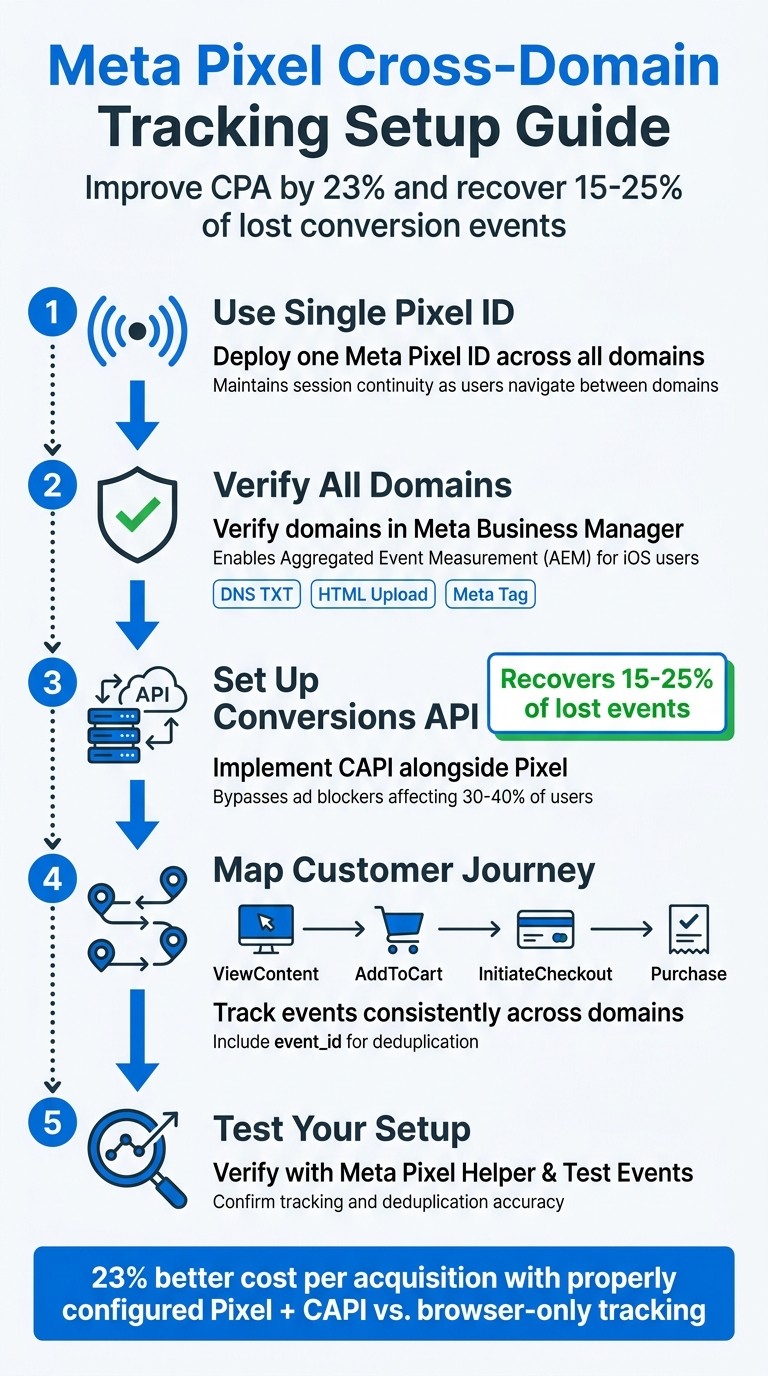
Cross-domain tracking with Meta Pixel ensures accurate attribution when users navigate between multiple domains in your sales funnel. Without it, Meta may lose track of a user’s journey, resulting in incomplete data and missed conversions. Here’s the key to getting it right:
Use a single Meta Pixel ID across all domains to maintain session continuity.
Verify all domains in Meta Business Manager to enable Aggregated Event Measurement (AEM) for iOS users and secure event configurations.
Set up the Conversions API (CAPI) alongside the Pixel to recover 15–25% of lost events due to ad blockers and privacy settings.
Map the customer journey to ensure events like ViewContent, AddToCart, and Purchase are consistently tracked across domains.
Test your setup with tools like Meta Pixel Helper and Test Events to confirm proper tracking and deduplication.
Properly configured cross-domain tracking improves your cost per acquisition by up to 23%, optimizes ad performance, and ensures Meta’s algorithm receives the data it needs for better targeting.
Let’s dive into the setup process and troubleshooting tips to ensure your tracking works seamlessly. If you encounter issues, refer to our guide on Meta Pixel debugging to resolve common errors.
Meta Pixel Cross-Domain Tracking Setup: 5-Step Implementation Guide
What You Need Before Setting Up Cross-Domain Tracking
Before diving into the process of adding Meta Pixel code to multiple domains, there are three key steps you need to take to ensure smooth tracking and accurate conversion data.
Verify All Domains in Meta Business Manager
Domain verification is a required step for Aggregated Event Measurement (AEM), which is the system Meta uses to track conversions from users on iOS 14.5 and later. Without verification, Meta won’t recognize which Business Manager account has the authority to prioritize and configure conversion events for your domains.
When verifying, focus on your top-level domain (like "example.com"). Meta will automatically include all subdomains (like "shop.example.com" or "checkout.example.com"), saving you the trouble of verifying each one separately.
You can choose from three verification methods, depending on your access and setup:
Verification Method | Requirements | Ideal For |
|---|---|---|
DNS TXT Record | Access to domain registrar or DNS settings | Users without access to the server root |
HTML File Upload | Access to the website’s root directory via FTP or CMS | Users with server access but no DNS access |
Meta Tag (HTML) | Access to the |
Once your domain is verified, you can prioritize up to 8 conversion events per domain under AEM. Rank these events by importance - such as setting Purchase as Priority 1 - so Meta reports the most valuable actions for iOS users who opt out of tracking. Keep in mind, any changes to AEM settings may take up to 72 hours to reflect.
After verification, use the Traffic Permissions feature in Events Manager to create an allow list of domains authorized to send pixel events. This step helps protect your data from being impacted by unauthorized or malicious domains.
Finally, ensure all your verified domains use the same Pixel ID to maintain consistency across your sites.
Use the Same Pixel ID on All Domains
Using a single Pixel ID across all domains is crucial for combining customer data and ensuring seamless session tracking. When someone moves from your landing page (Domain A) to your checkout page (Domain B), the same Pixel ID ensures Meta recognizes them as the same individual, not two separate visitors.
"The Pixel ID remains the same across all your websites - what changes is which events you configure and how you implement them on each site." - Benly.ai
Properly configured Pixel and Conversions API (CAPI) integrations can lead to 23% better cost per acquisition compared to browser-only tracking. This is especially important since 30% to 40% of internet users use ad blockers, and pairing Pixel and CAPI dual tracking can recover 15% to 25% of conversion events that browser-only setups miss.
To implement this, include the same JavaScript base code in the <head> section of every page across all domains. If multiple agencies or partners need their own Pixels on the same pages, use the trackSingle and trackSingleCustom commands to ensure events are attributed to the correct Pixel ID.
Map the Customer Journey Across Domains
Once your domains are verified and you’ve set up a unified Pixel ID, map out your customer journey to optimize event tracking. Document the full path users take across your domains - from the first click on your Meta ad to the final conversion. This helps identify where the Pixel needs to be placed, which events need to fire, and whether third-party platforms (like payment gateways) should be added to your Traffic Permissions allow list.
For instance, if your funnel transitions from blog.example.com (ViewContent) to shop.example.com (AddToCart) to checkout.example.com (Purchase), ensure you verify all three domains and configure events to fire consistently at each step. Missing even one domain can break the tracking chain, causing Meta to lose the connection between the ad click and the conversion.
Your map should also highlight where to add deduplication parameters. When using both Pixel and CAPI across domains, pass a unique event_id for every action to prevent Meta from double-counting conversions. This is especially critical for checkout events, where a single purchase could otherwise be recorded twice - once by the browser Pixel and once by the server-side API.
Funnel Stage | Recommended Standard Event | Key Parameters to Map |
|---|---|---|
Product Discovery | ViewContent | content_ids, value, currency |
Intent to Buy | AddToCart | content_ids, value, currency |
Checkout Start | InitiateCheckout | content_ids, num_items, value |
Final Conversion | Purchase | content_ids, value, currency, event_id |
Lastly, take note of any third-party redirects or partner integrations in your funnel. If a user clicks your ad and passes through an affiliate network or advertising platform before landing on your site, both the business domain and the third-party domain must be added to your allow list. If not, Meta will block those events, and you won’t be able to recover them.
How to Install Meta Pixel for Cross-Domain Tracking
Once you've verified your domains and mapped the customer journey, the next step is setting up the Meta Pixel for smooth cross-domain tracking.
Add Meta Pixel Code to All Domains
The same Meta Pixel ID needs to be placed in the <head> tag of every page across all domains.
If you're doing this manually, log into Meta Events Manager, copy your Pixel base code, and paste it into the <head> tag of each page. This requires access to your website's code.
For those using Google Tag Manager (GTM), create a Custom HTML tag containing your Pixel code. Set the tag to fire once per page and use an All Pages trigger.
If your platform supports integrations (e.g., Shopify, WooCommerce, Wix), you can use their built-in tools for Pixel installation. These integrations automatically track standard events, saving you from manual coding. However, you’ll still need to verify each domain in Meta Business Manager and add them to the Traffic Permissions Allow List in Events Manager.
After installation, configure your standard events to ensure consistent data collection across domains.
Set Up Standard Events for Consistent Attribution
Standard events like ViewContent, AddToCart, InitiateCheckout, and Purchase should be set up on every domain.
To enable better tracking and optimization, include standardized data formats such as value, currency, content_ids, and content_type with each event. For example, the Purchase event should pass details like the transaction amount, the currency (e.g., USD), and the product IDs from the order.
Also, include a unique event_id with each event. This prevents double-counting when using both Meta Pixel and CAPI together.
In Meta Events Manager, prioritize your top eight events under Aggregated Event Measurement (AEM) for users on iOS 14.5 and later. Assigning Purchase as Priority 1 ensures your most valuable conversions are always captured accurately.
Once your events are configured, use the Meta Pixel Helper to verify everything is working correctly.
Test Your Installation with Meta Pixel Helper
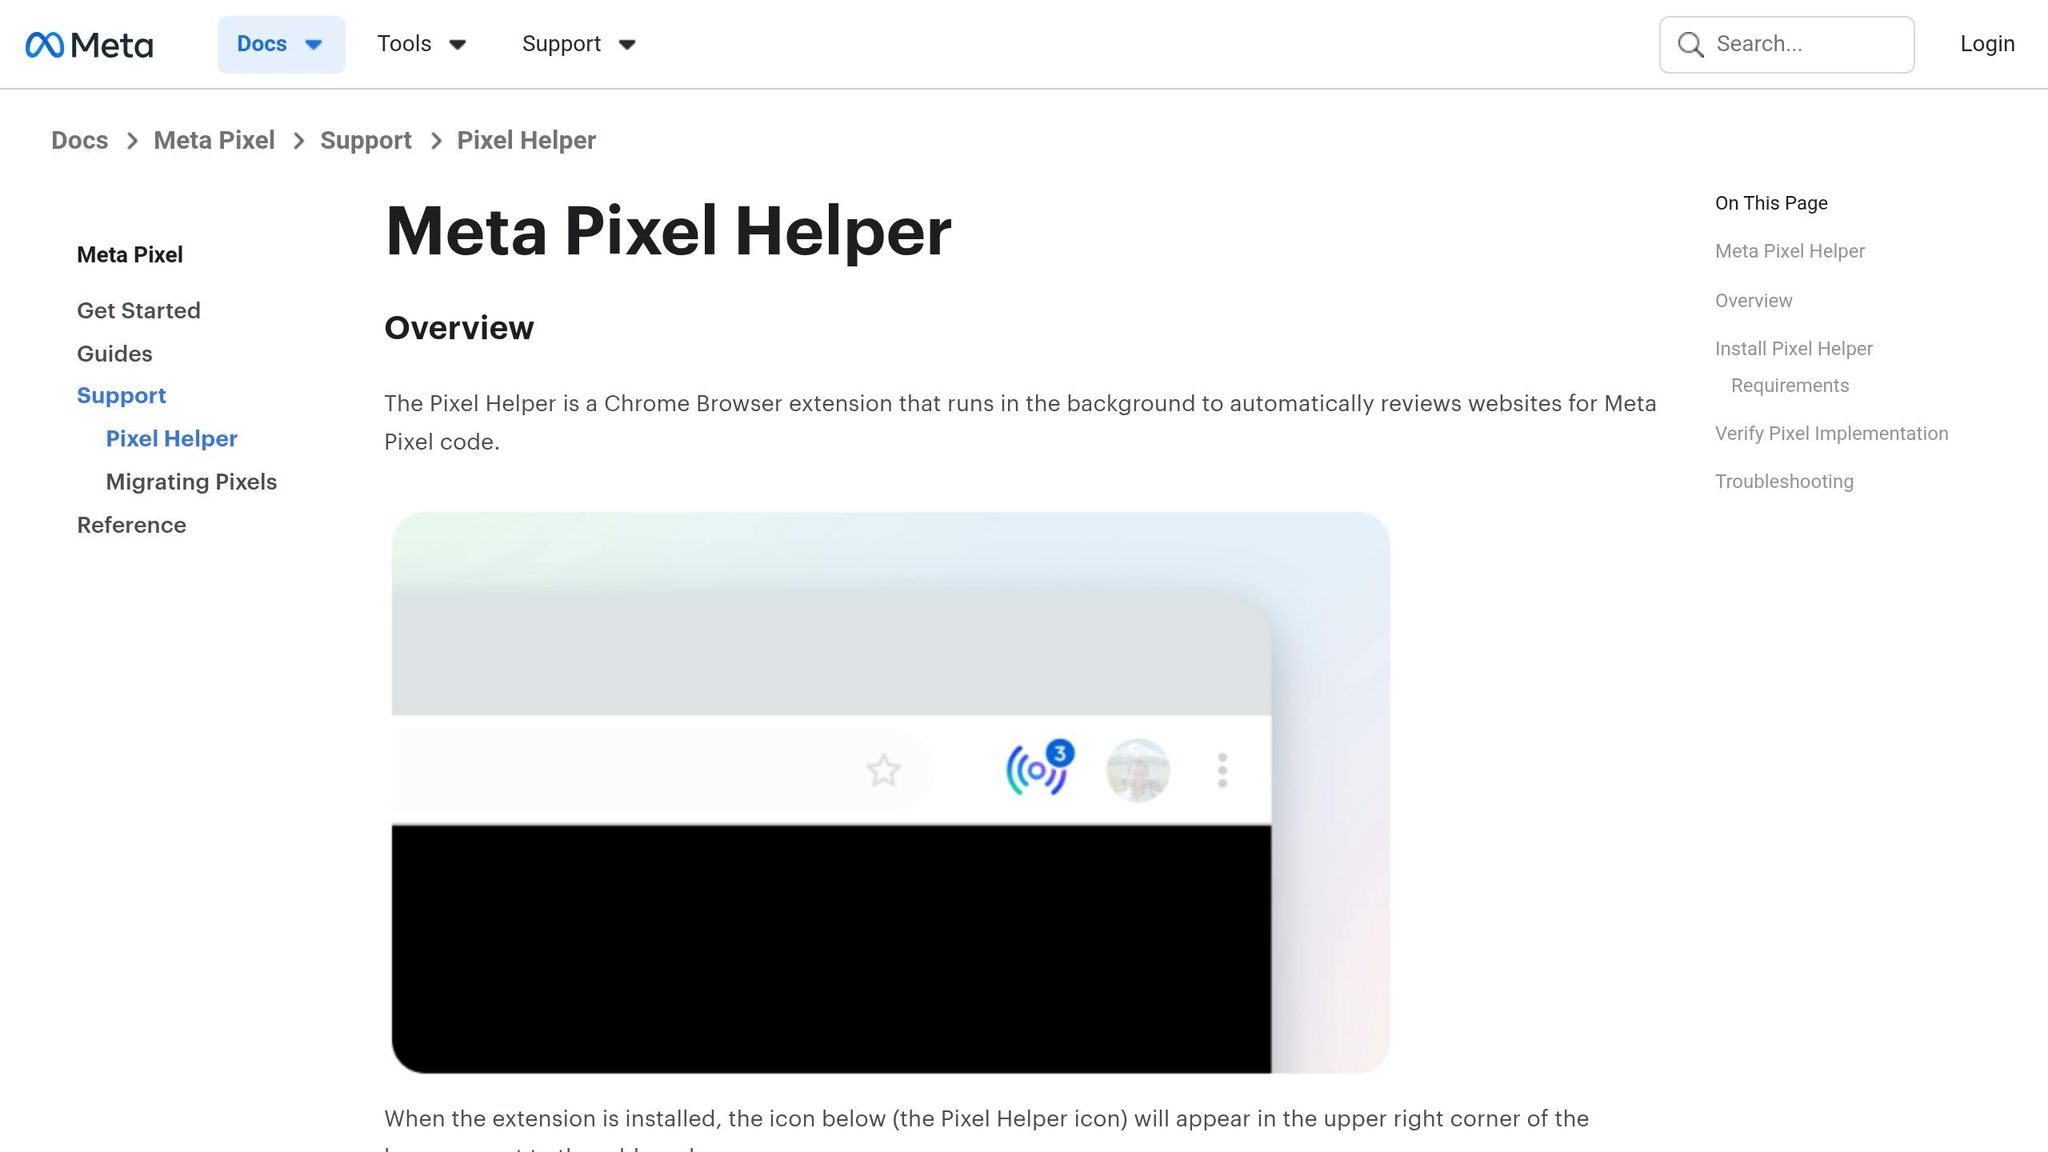
The Meta Pixel Helper Chrome extension is an essential tool for testing your setup. As you browse your site, the extension shows a badge indicating how many events fired on each page. Clicking the badge reveals details like your Pixel ID, event names, and the parameters being passed.
Test the full customer journey - landing page, product view, add to cart, and purchase - on all domains. At each stage, use the Pixel Helper to confirm that the correct events are firing and that key data, such as value, currency, and content_ids, is being captured. Green checkmarks indicate successful data transmission, while red or yellow warnings highlight issues like missing parameters or formatting errors.
"The quality of your Pixel implementation directly correlates with campaign performance." - Benly.ai
Double-check for duplicate Pixel IDs on the same event to avoid double counting. Additionally, ensure the event_id parameter is present when using both Pixel and CAPI. This ensures deduplication is functioning correctly. For server-side events, use the Test Events tool in Events Manager to monitor both browser and CAPI data in real time.
How to Verify Domains in Meta Business Manager
Domain verification in Meta Business Manager ensures that your Business Manager account has control over event configurations for your domain. This prevents third parties from misusing your Pixel ID, which could distort your data. Verifying all domains under the same Business Manager also simplifies event control and traffic permissions across your domains. Beyond security, domain verification helps create a unified view of the customer journey, which is essential for accurate cross-domain attribution.
Verify Domains Using DNS or HTML
You have three options for domain verification: DNS TXT record, HTML file upload, or meta tag. The choice depends on your level of access to the domain or website.
DNS TXT Record: Start by logging into Meta Business Manager, navigating to Brand Safety, and selecting Domains. Click "Add" to input your domain name. Meta will provide a TXT record. Copy this record, then log into your domain registrar (like GoDaddy or Namecheap) and add the TXT record to your DNS settings.
HTML File Upload: Download the verification file provided by Meta. Upload it to your website's root directory using FTP, SFTP, or your hosting control panel. The file must remain accessible at
yourdomain.com/filename.htmlfor the verification to work.Meta Tag: Insert a
<meta>tag (provided by Meta) into the<head>section of your homepage. This method is ideal if you have access to the website's CMS or HTML code but not its DNS settings.
Verification Method | Implementation Action | Best For |
|---|---|---|
DNS TXT Record | Add a TXT record to your domain registrar's DNS settings. | Users with access to domain registrar (e.g., GoDaddy). |
HTML File Upload | Upload a Meta-provided file to the root folder via FTP. | Users with access to website server files or hosting. |
Meta Tag (Alternative) | Add a | Users with CMS or HTML access but no DNS access. |
Once Meta verifies your domain ownership, you can proceed to configure full event control.
Enable Full Event Control for Verified Domains
After verification, head to Events Manager and open the Aggregated Event Measurement tab. Here, you can configure and prioritize conversion events for each domain. The order of these events determines which action Meta attributes if a user completes multiple events.
For e-commerce businesses, it's a good idea to rank Purchase as Priority 1, followed by InitiateCheckout and AddToCart. This ensures that your most important conversions are captured, even if users opt out of tracking.
Finally, set up Traffic Permissions in Events Manager to allow only recognized domains to send data through your Pixel. This step secures your data pipeline and prevents unauthorized data sharing.
Meta reports that accounts with properly configured Pixel and CAPI integrations see a 23% improvement in cost per acquisition compared to browser-only tracking, though you should compare Meta's attribution vs. third-party tools to verify these gains. Additionally, server-side tracking with CAPI can recover 15% to 25% of conversion events that browser-based Pixels miss due to ad blockers or privacy settings. This makes a strong case for fully integrating these tools into your tracking strategy. For a deeper dive into server-side implementation, follow our Meta Conversions API setup guide.
Best Practices for Cross-Domain Tracking
Once installation and verification are complete, following these steps will help you maintain accurate and efficient cross-domain tracking.
Use Consistent Event Names and Parameters
To ensure seamless event tracking across domains, consistency is key. Stick to Meta's standard events, such as Purchase, AddToCart, and Lead, rather than creating custom ones. These standard events are optimized by Meta's algorithms, making them more effective for actions like ROAS calculations and dynamic product ads.
Each standard event should always include its required parameters across all domains. For instance, the Purchase event must consistently have value, currency, content_ids, and content_type. This consistency ensures accurate performance tracking and reporting.
Add a unique
event_idto every event to prevent duplicate signals.If multiple pixels are on the same page, use
trackSingleto avoid firing events multiple times.Maintain a centralized document to map all events and their parameters across domains. This will help prevent mismatches during site updates.
Monitor Events in Meta Events Manager
Meta’s Test Events tool is invaluable for real-time event verification. Use it to check that transitions between domains - like moving from a landing page to a third-party checkout - trigger the correct events with the right parameters.
Regularly check the Diagnostics tab to address issues like missing events, parameter errors, or unexpected drops in event volume. Meta flags these problems so you can resolve them quickly. Pay close attention to your Event Match Quality (EMQ) score. Aim for a score of 6.0 or higher, with anything above 8.0 considered top-tier. You can improve low scores by including hashed customer data, such as emails or phone numbers, with your events.
To secure your data, set up Traffic Permissions. This allows you to create an allow list of domains authorized to send pixel events. This step helps block unauthorized domains from distorting your reporting. If you use third-party technology that redirects traffic, make sure to add both your business domain and the third-party domain to this list.
Once your events are properly monitored and optimized, you can explore automation tools to further boost performance.
Use Automation Tools for Ad Optimization
Automation platforms can take your ad performance to the next level by leveraging real-time conversion signals. For example, AdAmigo.ai is an AI-driven tool designed for Meta ads that continuously optimizes creatives, targeting, budgets, and bids.
Google Tag Manager offers a streamlined way to manage tracking tags across multiple domains without requiring manual code changes. If you’re looking for server-side tracking, the Conversions API Gateway translates browser events into server events , which can also be used for offline data sync, helping you bypass ad blockers that affect 30–40% of users.
Platforms like Shopify, WooCommerce, and WordPress also provide built-in connectors for Meta Pixel and Conversions API. These tools ensure consistent event tracking across domains. Accounts that combine Pixel and CAPI integrations often see a 23% improvement in cost per acquisition and recover 15–25% of conversion events that browser tracking might miss.
Fixing Common Cross-Domain Tracking Problems
Even with your Meta Pixel properly installed and verified, cross-domain tracking can sometimes hit snags. Common challenges like session breaks, event mismatches, and attribution gaps can interfere with your data accuracy. Here’s how to tackle these issues.
How to Fix Session Breaks
Session breaks happen when tracking parameters - like _fbc (Facebook Click ID) or _fbp (Facebook Browser ID) - aren’t preserved as users navigate between domains. This can result in splitting a single user’s journey into multiple sessions.
To resolve this:
Use the Test Events tool to confirm that events across your funnel are being tracked as part of the same session.
Check with the Meta Pixel Helper Chrome extension to ensure the same Pixel ID is firing across all domains. Having duplicate pixels can disrupt session tracking.
Go to the Traffic Permissions tab in Events Manager and add both your primary domain and third-party domains (like payment processors) to the Allow List.
Set up the Conversions API (CAPI) alongside your browser Pixel. This combination ensures conversions are captured, even if cookies are blocked during domain transitions.
Lastly, verify that your event names are consistent across domains to avoid fragmenting your data by mapping events correctly.
How to Fix Event Mismatches
Event mismatches occur when different event names or parameters are used across domains. For example, one site might fire an "AddToCart" event, while another uses "Add_To_Cart." Meta treats these as separate actions, leading to fragmented data.
Here’s how to avoid this:
Stick to Meta’s standard events - like Purchase, AddToCart, and InitiateCheckout - on every domain.
Use the Meta Pixel Helper to confirm that event names and key parameters (like value, currency, and content_ids) are consistent.
If multiple pixels are present, opt for trackSingle instead of the usual
fbq('track')to prevent data conflicts.
How to Fix Attribution Gaps
Attribution gaps occur when Meta can’t link conversions back to the original ad click. This often happens due to missing _fbc parameters, ad blockers (affecting 30–40% of users), or privacy restrictions on iOS devices.
To address this:
Verify all domains in Meta Business Manager using DNS TXT records or HTML file uploads. This enables Aggregated Event Measurement (AEM), ensuring events are properly attributed.
Implement the Conversions API to capture data that browser-side tracking might miss.
Include hashed customer data - like email or phone number - with each event to improve your Event Match Quality (EMQ) score. Aim for a score of at least 6.0, with 8.0 or higher being ideal.
Assign a unique event_id to each action to help Meta deduplicate signals from both the Pixel and CAPI.
Ensure the Facebook Click ID (fbclid) is passed across domains to link conversions to ad clicks.
Conclusion
To set up Meta Pixel for cross-domain tracking, focus on three key actions: use a single Pixel ID across domains, avoid common pixel misconfigurations by verifying each domain in Meta Business Manager using a compliance checklist, and integrate real-time conversion tracking by combining CAPI with your browser Pixel. This combination ensures accurate attribution across customer interactions. In fact, accounts using both Pixel and CAPI report a 23% improvement in cost per acquisition compared to browser-only tracking. Additionally, CAPI can recover 15–25% of conversion events that might otherwise be lost due to ad blockers or iOS privacy settings.
Aim to maintain an EMQ score of at least 6.0 (with 7.5+ being ideal) by passing hashed customer emails and phone numbers. This, paired with using a unique event_id for both browser and server events, helps achieve an 80% deduplication rate, preventing double-counting. Passing hashed customer data can also push match rates above 70%.
Once your tracking is properly set, you can unlock automation for better campaign performance. Tools like AdAmigo.ai use cross-domain tracking data to automatically optimize campaigns by scaling successful strategies and adjusting creatives, targeting, and budgets in real-time. Their AI Chat Agent even lets you ask questions like, "Why did ROAS drop yesterday?" and make changes directly through the conversation.
"Your tracking setup becomes the foundation for intelligent automation that scales what works and eliminates what doesn't." - AdStellar AI
FAQs
Do I need to verify subdomains too?
To ensure accurate cross-domain tracking, it's essential to verify and install the Meta Pixel on all relevant domains and subdomains. This step matters because the _fbc cookie value doesn't automatically carry over when users move between different domains or subdomains.
How do I keep _fbc and _fbp across domains?
To keep the _fbc and _fbp cookies working across different domains, you’ll need to enable cross-domain tracking for the Meta Pixel. Here’s how to do it:
Use Google Tag Manager (GTM) along with custom JavaScript to transfer the _fbc value between domains.
Add the _fbc and any other required parameters to outbound links on the first domain.
Make sure both domains use the same GTM container ID and have the Meta Pixel properly installed.
This setup helps maintain accurate attribution when users move between domains.
How do I deduplicate Pixel and CAPI events?
To ensure accurate tracking and avoid double-counting conversions, assign a unique event ID to each conversion. This ID should be included in the payloads for both the Pixel and Conversion API (CAPI) events. By doing so, Meta can identify and merge duplicate events, ensuring your reports are precise.
If you're using tools like Google Tag Manager, make sure the same event ID is shared between the Pixel and CAPI calls. This synchronization is key to proper deduplication and reliable data.