
Meta Pixel Configuration for Accurate Audience Data
Correct pixel setup with advanced matching and server-side tracking recovers lost conversions and builds precise, high-quality audiences.
The Meta Pixel is a small piece of JavaScript code that tracks user actions on your website, such as browsing, adding items to a cart, or completing purchases. This data is sent to Meta, enabling better ad targeting, audience building, and campaign optimization. However, with privacy changes like iOS privacy restrictions and widespread use of ad blockers, properly setting up the Pixel is more important than ever. Combining it with tools like the Conversions API and Automatic Advanced Matching can significantly improve data accuracy and ad performance.
Key Takeaways:
What You Need: A Meta Business Manager account, website admin access, and a privacy compliance plan (GDPR/CCPA).
How to Set It Up: Install the Pixel manually, via partner integrations (e.g., Shopify), or with Google Tag Manager.
Improve Accuracy: Use Automatic Advanced Matching and the Conversions API to recover up to 25% of lost conversion data.
Audience Building: Leverage Pixel data to create Custom and Lookalike Audiences for retargeting and scaling campaigns.
Proper Pixel setup ensures accurate tracking, better audience segmentation, and improved ad performance, even in a privacy-restricted environment.
The Easiest Facebook Ads Pixel Tutorial (With GTM) | 2025 Step-by-Step Tutorial
What You Need Before Setting Up Meta Pixel
Before installing Meta Pixel, make sure you have these three essentials: a Business Manager account, website administrator access, and a privacy compliance plan. Below, we’ll break down each requirement and how to ensure you’re ready.
Meta Business Manager Account
To collect accurate audience data, you’ll need a Business Manager account. The Meta Pixel must be owned by a Business Manager account - not linked to a personal ad account. If your Pixel was created in a personal account, you’ll need to transfer it to Business Manager so it can be shared with team members or connected to multiple ad accounts.
Additionally, you’ll need Admin access in Business Manager to create new Pixels, claim existing ones, or assign access to others. Without Admin rights, you won’t be able to manage the Pixel under "Data Sources" in Business Settings. Assign roles to internal teams through "People" or to external agencies via "Partners" to keep responsibilities clear.
Website Administrative Access
To install the Pixel, you must have administrator access to your website. If you’re installing it manually, you’ll need the ability to edit your website’s HTML code and paste the JavaScript snippet into the <head> section of every page. If you’re using platforms like WordPress, Shopify, Wix, or WooCommerce, you’ll need admin credentials to install plugins or activate Meta’s built-in integrations.
For domain verification - required for Aggregated Event Measurement - you’ll need access to your domain’s DNS settings or your web server’s root directory. If you’re using Google Tag Manager (GTM), ensure you have administrative rights to the GTM container and the ability to embed the container snippet into your site’s code. Double-check that you have all necessary credentials before proceeding.
Privacy and Consent Requirements
Meeting privacy standards is crucial for both compliance and maintaining accurate audience data. GDPR applies to companies processing personal data from EU residents and requires explicit consent before tracking begins. Meanwhile, CCPA mandates opt-out options for California residents, which can be managed by enabling the "Limited Data Use" (LDU) flag in your Pixel code.
To comply with GDPR and CCPA, use a Consent Management Platform (CMP) to sync user choices in real time. Add fbq('consent', 'revoke'); before the Pixel init call to pause data collection until consent is granted, then use fbq('consent', 'grant'); once users agree. Update your Privacy and Cookie Policies to clearly mention the Meta Pixel, specify the data types collected (such as HTTP headers and button clicks), and explain why the data is being processed.
How to Create and Install Meta Pixel
Creating Your Pixel in Events Manager
To get started, open Meta Events Manager through your Business Suite. Click the green "Connect Data Sources" button and select "Web" as your data source. Then, choose "Meta Pixel" as your connection method. You'll need to name your Pixel - pick something descriptive like "[Your Company Name] Website Pixel" - and enter your website URL. Meta will check if your platform supports a native integration, which can make installation easier. Once done, Meta generates a unique 15-16 digit Pixel ID for you to use when connecting the tracking code to your site. Don't forget to verify your domain settings as outlined earlier in the process.
Once your Pixel is created and your domain verified, you're ready to install the Pixel code on your website.
Adding the Pixel Code to Your Website
The installation method depends on your website platform and level of access. Here are your main options:
Manual Installation: Copy the JavaScript code provided in Events Manager and paste it into the
<head>section of every page on your site.Partner Integrations: If you use platforms like Shopify, WooCommerce, BigCommerce, Wix, Squarespace, or Webflow, you can simply enter your Pixel ID through their built-in integrations - no coding required.
Google Tag Manager: Use the Meta Pixel template in Google Tag Manager. Add your Pixel ID and set the trigger to "All Pages."
Since 30-40% of internet users use ad blockers, combining Meta Pixel and Conversions API can help improve the accuracy of your data.
Verifying the Pixel Works Correctly
After installation, make sure your Pixel is functioning as it should. Start by downloading the free Meta Pixel Helper Chrome extension from the Chrome Web Store. Visit your website and click the extension icon - a green checkmark confirms the Pixel is working. If you see a red icon or error messages, check for issues like duplicate installations or missing code.
You can also use the Test Events tool in Events Manager for real-time verification. Select your Pixel, go to "Test Events", enter your website URL, and perform actions like adding items to your cart. These actions should appear in the log within seconds. If you're using both Pixel and CAPI, verify that events are properly deduplicated by matching their event_id values. This ensures the same conversion isn't counted twice. While data usually appears in Events Manager within minutes, it may occasionally take up to an hour.
How to Improve Pixel Data Accuracy
If you're already using Pixel, you know it's a powerful tool. But to keep your audience data as precise as possible, especially with tracking restrictions, you’ll need to go a step further. Browser tracking alone can lose up to 30% of conversions due to ad blockers, cookie limitations, and privacy regulations. Here’s how you can improve match rates and attribution.
Turning On Automatic Advanced Matching
Automatic Advanced Matching (AAM) is a feature that scans your site’s forms for identifiers like email addresses or phone numbers. These identifiers are hashed in-browser using SHA-256 and securely sent to Meta. This process enables a more accurate match between website actions and Meta user accounts, even when cookies are blocked or cleared.
Using AAM can boost your event match rates by up to 25% and help lower acquisition costs. Some advertisers have even reduced their ad spend by 10% to 20% while maintaining revenue.
To activate AAM, head to Meta Events Manager and select your Pixel. Under the Settings tab, toggle Automatic Advanced Matching to "ON." Click Show customer information parameters and enable all available fields, prioritizing email and phone numbers for their higher accuracy. Use tools like Meta Pixel Helper and Test Events to confirm data transmission, and note that it may take up to 48 hours to see updated match quality results.
"Advanced matching bridges the data from your website with Facebook's user base, helping you create better-optimised and more effective ad campaigns."
Goutham Veerabathini, CustomerLabs
However, businesses in sensitive industries - like financial services, insurance, or healthcare - are often prohibited from using automatic advanced matching. In these cases, manual implementation is required.
Once AAM is set up, you can focus on refining your event tracking for even better results.
Setting Up Standard and Custom Events
Meta’s pre-defined standard events (like Purchase, Lead, or AddToCart) are optimized by their algorithms, so use them whenever possible. To make these events even more effective, add parameters such as value, currency, content_ids, and content_type. These details help Meta calculate your ROAS, target high-value customers, and run dynamic product ads.
For actions that don’t fit standard events - like "DownloadedPricingGuide" - you can create custom events. Use clear naming conventions like CamelCase and document these events for team reference. If you’re running lead generation campaigns, assign an estimated value to Lead events based on your average deal size and close rate. This will give you a better sense of your campaign’s profitability.
Meta assigns Event Match Quality (EMQ) scores ranging from 0 to 10. Scores above 6.0 are good, while anything over 7.5 is excellent. Top-performing accounts often achieve scores between 8 and 10. Check the Diagnostics tab in Events Manager weekly to address issues like low event volume, parameter errors, or declining match quality.
"EMQ isn't just a tech metric; it's the difference between wasted impressions and perfectly targeted campaigns."
Rishhi Sharma, Marketing Expert
Adding the Conversions API
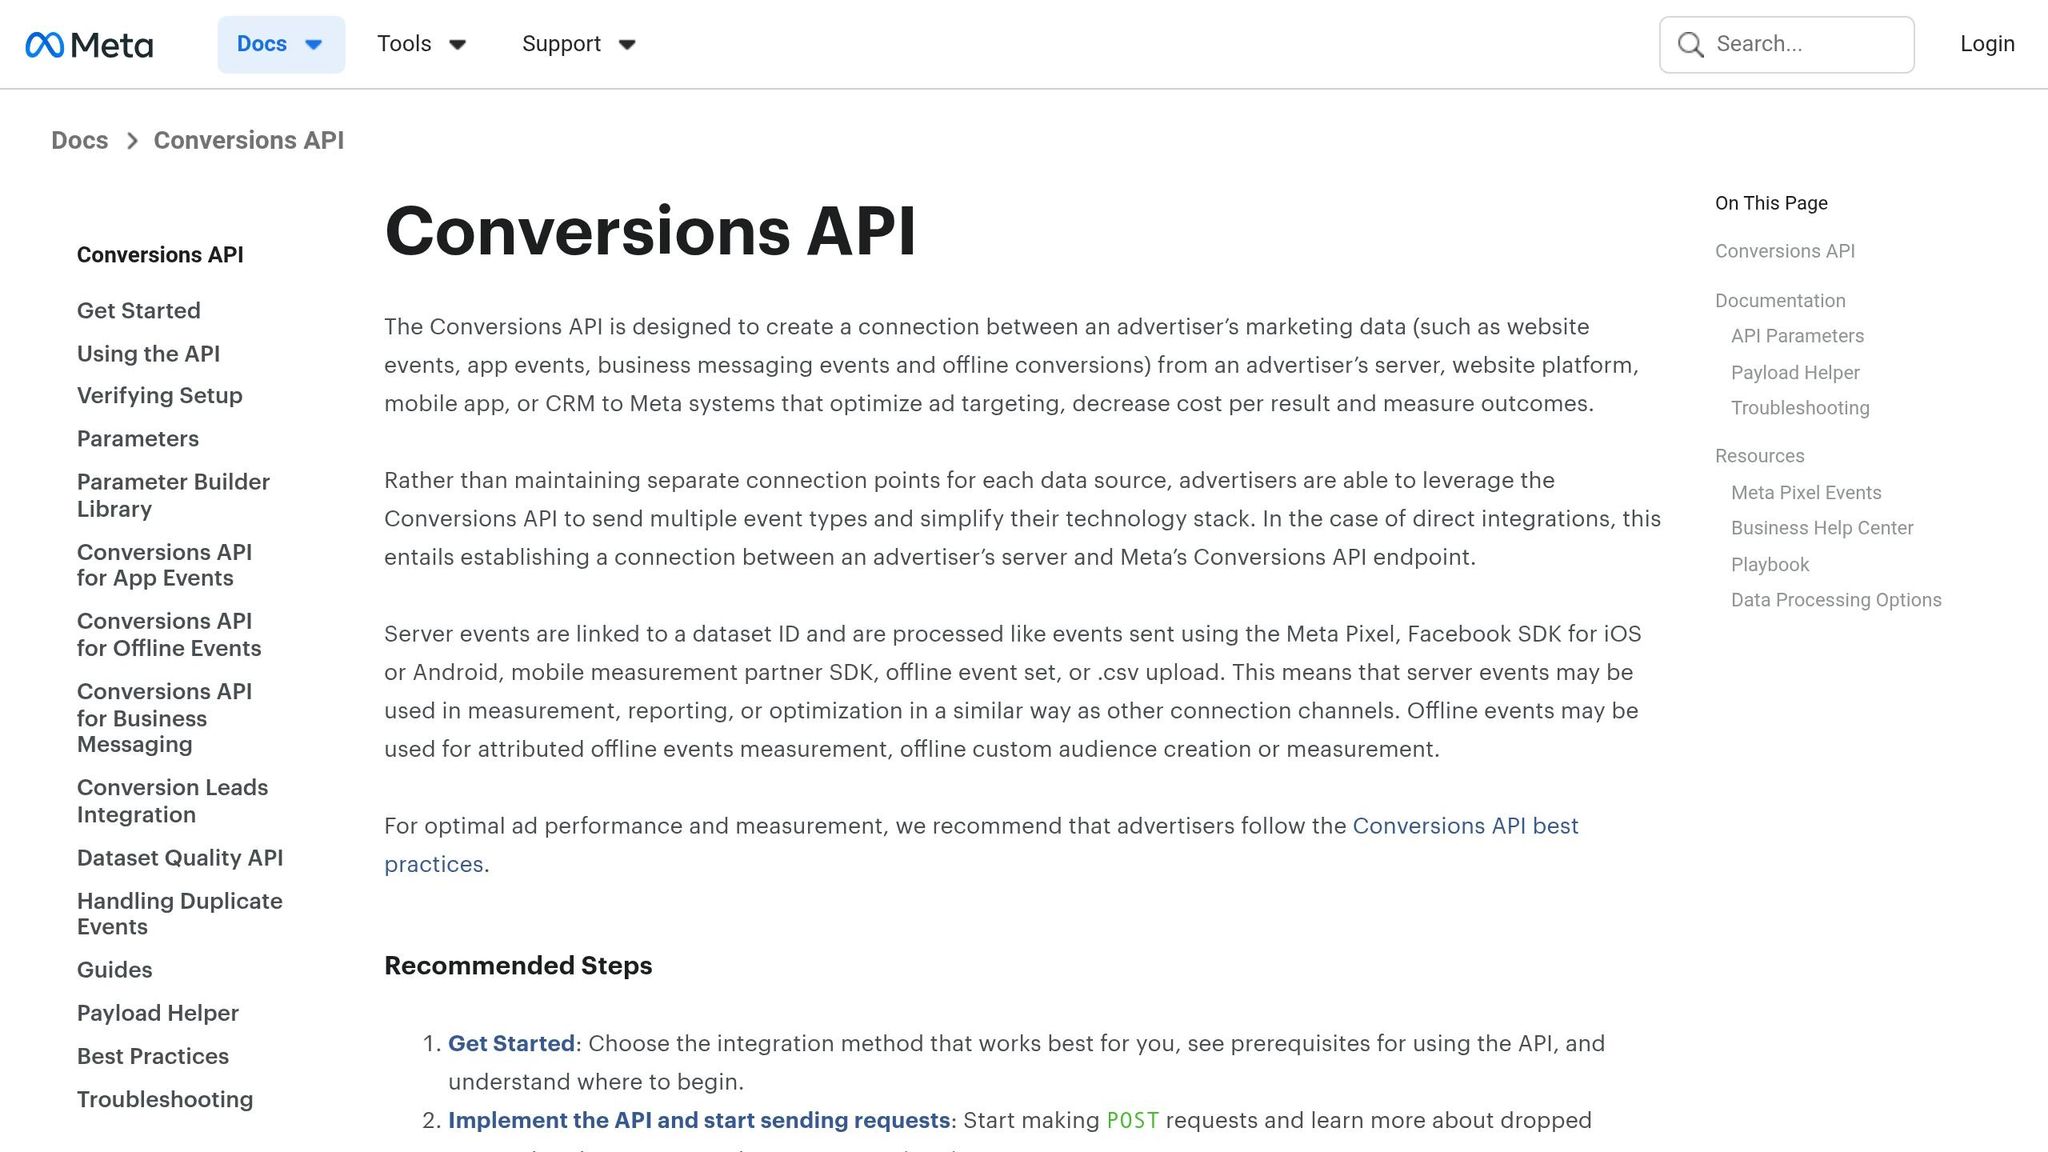
For even better tracking, consider adding server-side tracking through the Conversions API (CAPI). Unlike browser tracking, CAPI sends data directly from your server to Meta, bypassing obstacles like ad blockers, Safari's Intelligent Tracking Prevention, and iOS opt-outs. By implementing CAPI, you can recover 15% to 25% of conversions that browser tracking alone misses. Accounts with both Pixel and CAPI properly configured often see 23% better cost per acquisition.
To ensure accurate data, assign a unique event_id to each action. This allows Meta to deduplicate browser and server signals, treating server data as the primary source. In Events Manager’s Test Events tool, deduplicated events will display a link icon, confirming that browser and server signals have been merged into a single conversion.
CAPI also lets you send additional hashed identifiers (like emails, phone numbers, or IP addresses) to improve attribution accuracy. Always hash sensitive data with SHA-256 before sending it to Meta to stay privacy-compliant. If your EMQ score is below 6.0, consider adding extra matching parameters like external_id or phone numbers. For businesses with limited developer resources, the Conversions API Gateway offers a more automated setup.
Using Pixel Data to Build Audiences
Meta Pixel Tracking Methods Comparison: Match Rates and Audience Performance
To make the most of your Pixel data, focus on segmenting and targeting your audience based on their actions on your site. For example, you can group users who viewed a product, added items to their cart, or completed a purchase. By narrowing in on these behaviors, you can retarget high-intent users instead of casting a wide net over cold traffic. This approach not only improves targeting accuracy but also helps lower your ad costs.
Creating Custom and Lookalike Audiences
Kick things off by setting up Custom Audiences in the Audiences section of Ads Manager. Use standard vs custom conversions to decide your starting point, though standard events like Purchase or Lead are often best. Meta's algorithm is already optimized to identify users similar to those tied to these events, making them more effective than custom events. For instance, create a custom audience of users who added items to their cart in the past 30 days but didn’t check out, then retarget them with a discount offer.
Want to expand your reach? Build Lookalike Audiences based on your top-performing Custom Audiences. To start, you’ll need at least 100 users in your source audience from the same country, though Meta suggests 1,000 to 5,000 for the best results. Open the Create Audience menu, select Lookalike Audience, and choose your source (like a "Purchase" audience). Begin with a 1% similarity setting, which identifies users most similar to your existing customers. You can create up to 500 lookalike audiences from one source. These audiences typically populate within 3 days, but you can start running ads right away. As you scale, try 2% to 5% similarity settings to reach a broader audience without losing relevance.
Setting Up Value-Based Campaigns
Instead of focusing solely on conversion volume, you can teach Meta to prioritize your most profitable customers by sending value and currency parameters with your events. For e-commerce, this means including the actual purchase amount. For lead generation, assign an estimated value based on your average deal size and close rate. This allows Meta’s algorithm to find high-value users, boosting your return on ad spend without requiring a bigger budget.
To take things further, create value-based lookalike audiences by adding a "customer value" column when uploading customer lists. This ensures Meta targets users similar to your highest-spending customers, not just anyone who has purchased. When refining your audience strategy, consider whether to rely solely on browser-based tracking or integrate additional tools for better results.
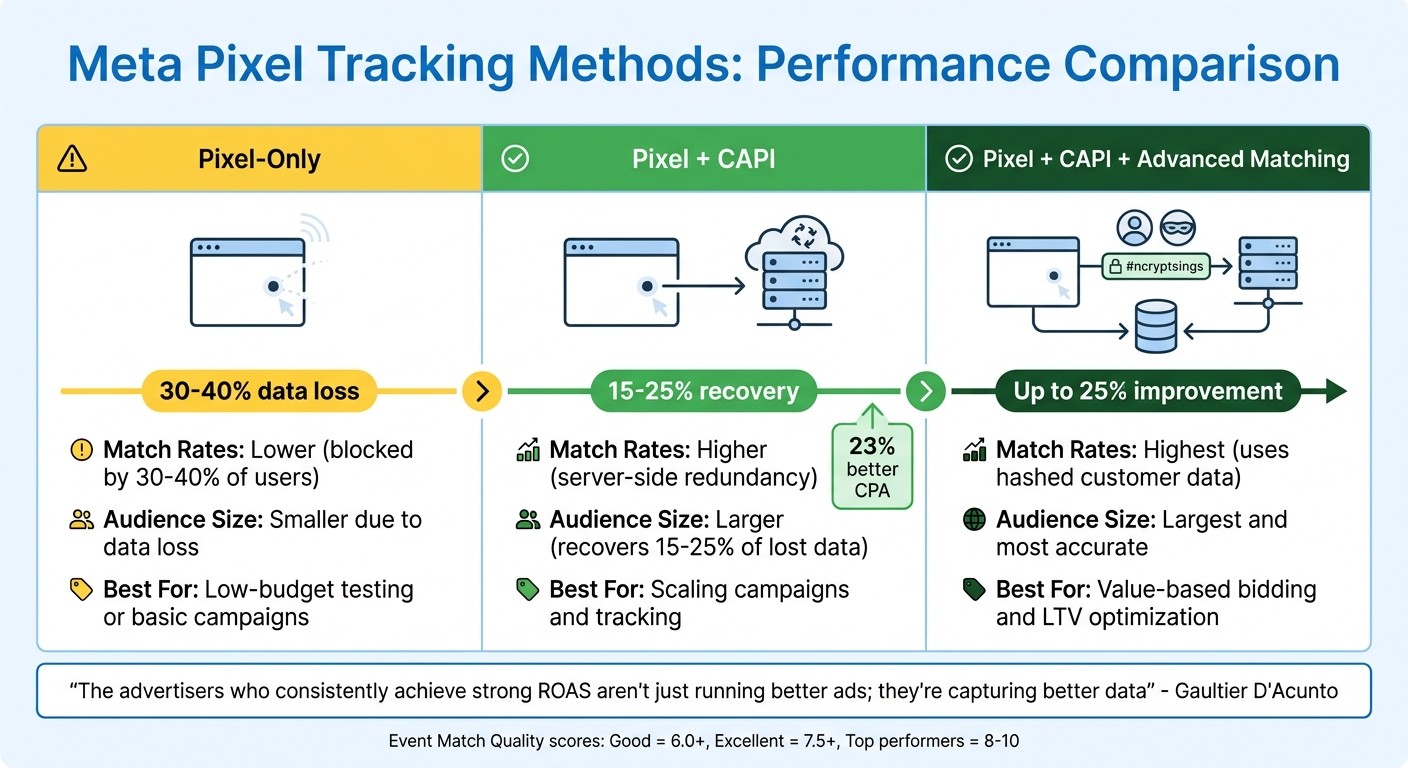
Pixel-Only vs. Pixel + CAPI + Advanced Matching
Your tracking setup plays a major role in the size and quality of your audience. Pixel-only tracking can lose 30% to 40% of data due to ad blockers and browser restrictions. Adding CAPI (Conversions API) helps recover 15% to 25% of those lost events, giving you larger retargeting pools. Layering in Advanced Matching - which uses hashed customer data like email or phone - further improves your Event Match Quality score, resulting in bigger and more precise retargeting groups.
Tracking Method | Match Rates | Audience Size | Best for |
|---|---|---|---|
Pixel-Only | Lower; blocked by 30-40% of users | Smaller due to data loss | Low-budget testing or basic campaigns |
Pixel + CAPI | Higher; server-side redundancy | Larger; recovers 15-25% | Scaling campaigns and tracking |
Pixel + CAPI + Advanced Matching | Highest; uses hashed customer data | Largest and most accurate | Value-based bidding and LTV optimization |
"The advertisers who consistently achieve strong ROAS aren't just running better ads; they're capturing better data that enables smarter optimization decisions."
Gaultier D'Acunto, Co-founder, Benly
Lastly, make sure to exclude your source Custom Audience from Lookalike campaigns. This ensures your ad budget is spent on reaching new potential customers, not retargeting the same ones.
Summary
Setting up your Meta Pixel correctly is essential for gathering accurate audience data and running profitable campaigns. Start by creating your Pixel in Events Manager, then install it using manual code, partner integrations, or Google Tag Manager. Use tools like Meta Pixel Helper and Test Events to ensure your events are firing properly.
To improve data accuracy, leverage Advanced Matching and the Conversions API. Together, these tools can recover 15% to 25% of conversion events that might otherwise be lost due to ad blockers or iOS privacy settings. For better algorithm performance, stick to standard events like Purchase or Lead instead of custom ones. Also, routinely check Diagnostics to maintain high match quality and use a unique event_id for both Pixel and API events to ensure proper deduplication.
"The advertisers who consistently achieve strong ROAS aren't just running better ads; they're capturing better data that enables smarter optimization decisions." - Gaultier D'Acunto, Co-founder, Benly
FAQs
Do I need both Meta Pixel and Conversions API?
Yes, combining Meta Pixel with the Conversions API improves the accuracy of your data and boosts ad performance. Using both tools together allows for more reliable tracking of conversion events, giving you a detailed understanding of your audience and how well your campaigns are working.
How do I prevent double-counting with Pixel and CAPI?
To prevent double-counting when using the Meta Pixel alongside the Conversions API (CAPI), you need to set up event deduplication. This is done by using the event_id parameter, which acts as a unique identifier connecting Pixel and CAPI events.
By including the same event_id in both Pixel and CAPI events for a single conversion, Meta can recognize duplicates and merge them. This ensures that each action is counted only once, maintaining accurate reporting.
What’s the easiest way to stay GDPR/CCPA compliant?
To comply with GDPR and CCPA while using the Meta Pixel, make sure to get explicit user consent before collecting any data. Clearly explain to users how their information will be used. Integrate the Meta Pixel with consent management platforms (CMPs) so tracking only begins after users give their permission.
You can also adopt privacy-friendly tools like server-side tracking and advanced matching to enhance data protection. Don’t forget to keep your cookie banners and privacy policies up to date to maintain transparency and build trust with your audience.