
Troubleshooting Meta Ads Pixel Issues
Fix Meta/Facebook Pixel errors—duplicate events, invalid IDs, and browser blocking—using Pixel Helper, Events Manager, GTM, and the Conversions API for reliable tracking.
The Meta Pixel is a key tool for tracking and optimizing Facebook ad performance. However, setup errors or external factors like browser settings and ad blockers can disrupt its functionality, leading to inaccurate data and wasted ad spend. Here’s what you need to know to fix common issues:
Frequent Problems: common Meta Pixel errors like duplicate event firing, invalid pixel IDs, missing data, and browser interference. These often stem from poor setup when you integrate Meta Ads with analytics tools.
Why It Matters: Errors can skew conversion tracking, hinder audience creation, and reduce campaign effectiveness.
Fixes: Use tools like Meta Pixel Helper and Events Manager Diagnostics to identify and resolve issues. Ensure proper code placement, avoid duplication, and consider the differences between Conversions API and pixels for more reliable server-side tracking.
How to Fix Meta Facebook Pixel Errors and Test Your Events
How to Diagnose Pixel Problems
Diagnosing pixel issues is easier when you use Meta's built-in tools, which help inspect real-time behavior, pinpoint errors, and confirm event firing.
Using Meta Pixel Helper
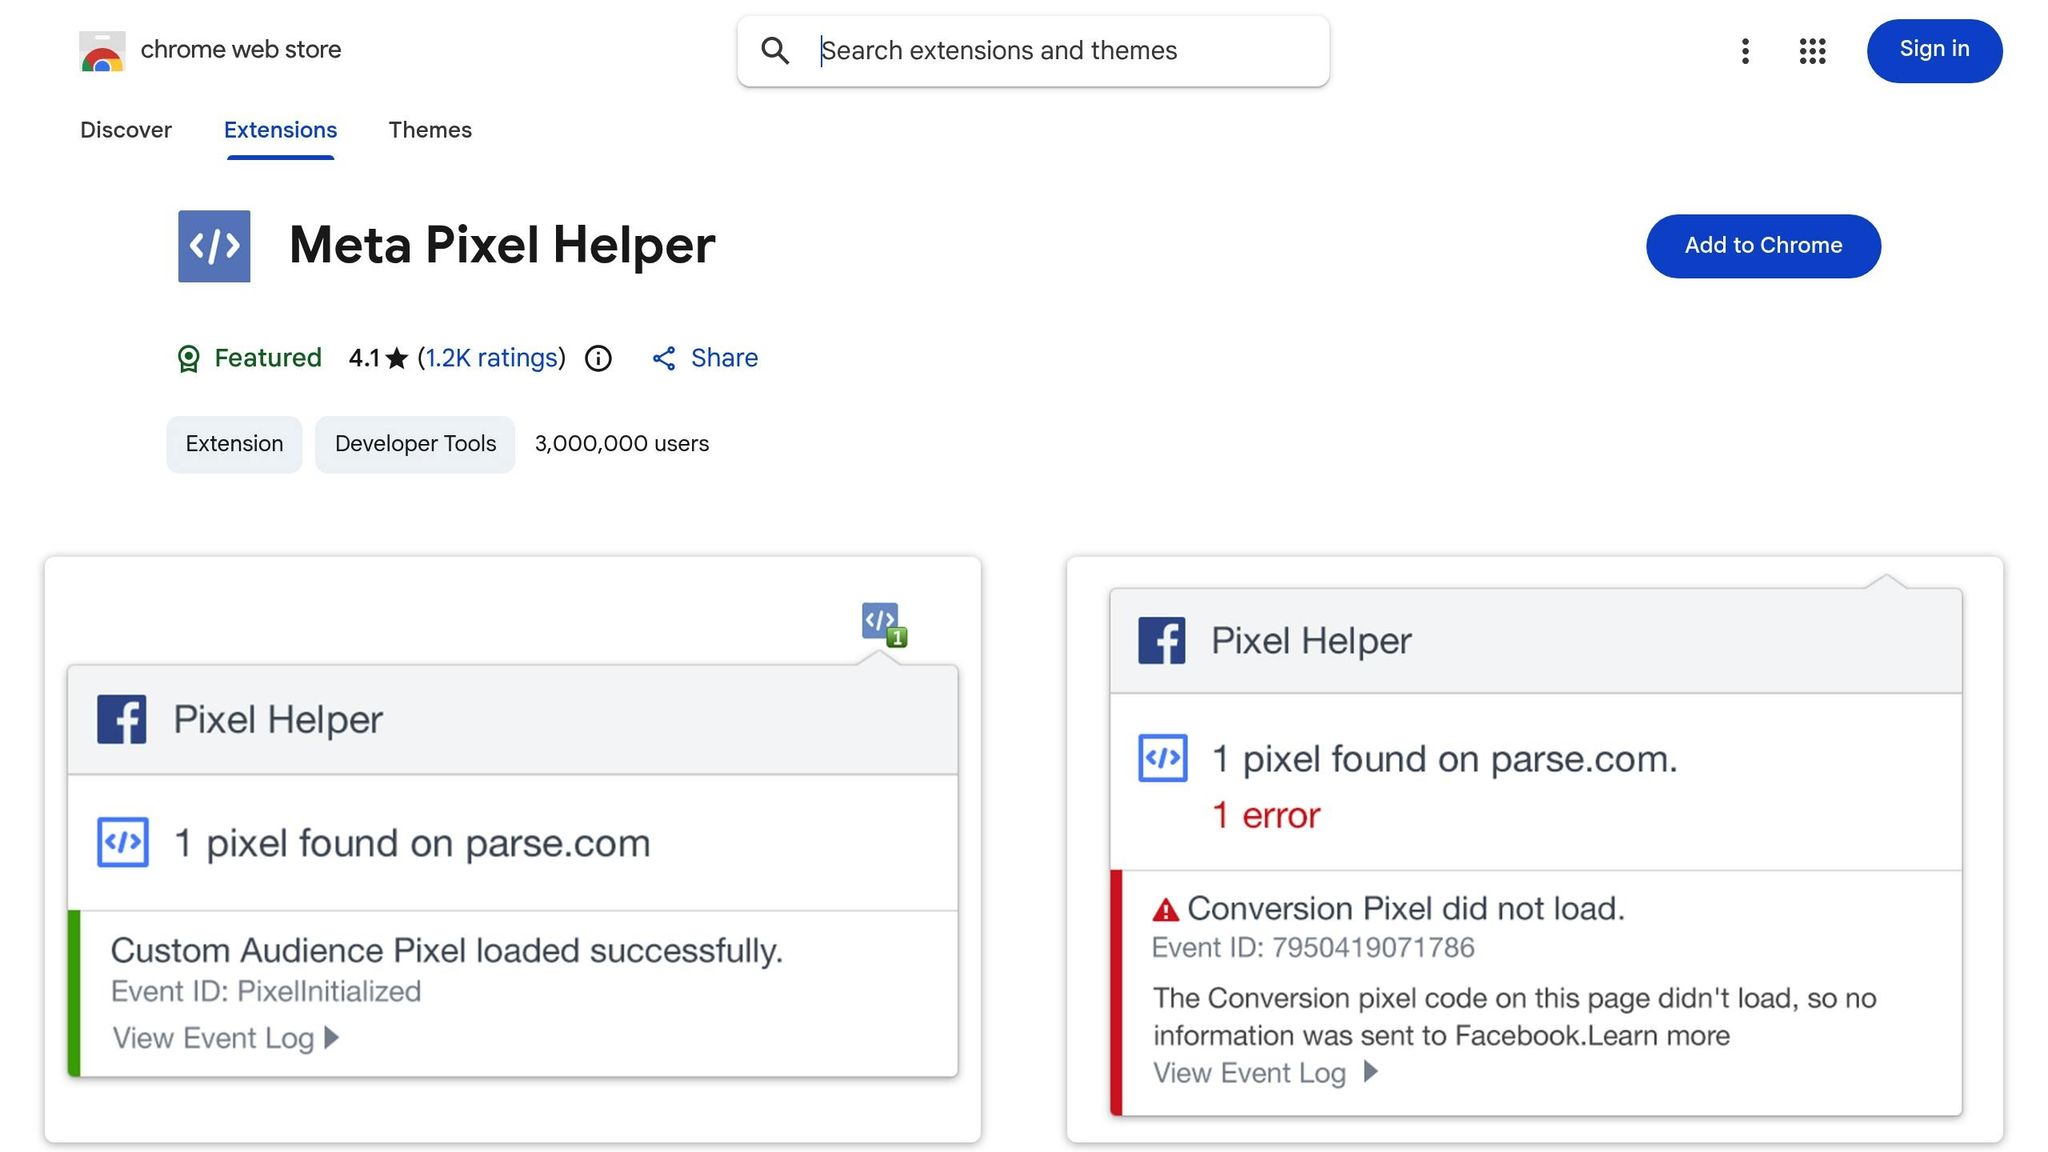
The Meta Pixel Helper is a free Chrome extension and a great starting point for troubleshooting. Once installed, the icon turns blue and displays the number of detected pixels on the page. Clicking the icon opens a popup that shows which pixels loaded successfully and lists all triggered events on that page.
This tool uses color-coded warnings to highlight issues. Red icons indicate critical errors that block tracking, while yellow icons flag warnings that could impact data accuracy. Some common errors include:
Pixel Did Not Load: The pixel code is present, but the HTTP call never triggered.
Not a Standard Event: For example, using "Purchased" instead of the correct "Purchase" (remember, events are case-sensitive).
Pixel Activated Multiple Times: The same event fires repeatedly, inflating your conversion metrics.
If you're testing dynamic events like button clicks, keep the Pixel Helper open to see if the event fires in real time. Also, disable any ad blockers before testing, as they can block pixel activity.
Checking Events Manager Diagnostics
The Diagnostics tab in Events Manager offers a centralized view of all pixel issues across your entire site. Unlike the Pixel Helper, which focuses on the page you're currently on, Diagnostics compiles errors from every URL where your pixel is installed. This makes it especially useful for identifying patterns, such as missing currency codes on checkout pages or invalid price formats across multiple product listings.
One standout feature is "See affected URLs," which allows you to click on an error and view the specific pages causing the problem. This feature removes the guesswork, enabling developers to address issues more efficiently. The Diagnostics tab updates in real time, so you can quickly verify whether your fixes are resolving the errors without waiting for delayed data refreshes.
Testing Events in Events Manager
The Test Events tab is perfect for simulating user actions and observing event firing. To use it, go to Events Manager, select your pixel under "Data Sources", and click "Test Events." Enter your website URL and click "Open Website" to start a live session. Actions like adding items to a cart, filling out forms, or completing purchases will instantly appear in the Test Events log.
You can click on any event to review its parameters, ensuring details like value, currency (entered as a three-letter code like USD, not "$"), and content_ids are accurate. The tool uses green for success, yellow for warnings, and red for errors, making it easy to spot and address issues quickly. To avoid skewed results, always test in incognito mode. Additionally, if you're using both the browser pixel and Conversions API, verify that both send the same event_id to prevent double-counting conversions by comparing Pixel and Conversions API event mapping.
Once you've identified the diagnostic issues, you're ready to move on to resolving common pixel errors in the next section.
Common Pixel Errors and How to Fix Them
Meta's tools can help diagnose common pixel errors like duplicate firing, invalid IDs, and browser-based blocking. Addressing these issues promptly can save you hours of debugging Meta conversion issues.
Fixing Duplicate Pixel Firing
Duplicate pixel firing happens when the same event is triggered multiple times for a single action, inflating your conversion data. This often occurs when the Pixel ID is installed in multiple places - for example, hardcoding it into your website's HTML while also deploying it through Google Tag Manager or integrations like Wix Marketing Integrations. Another common issue is Meta's Automatic Events feature, which might track actions already being captured by your manual event code, leading to double-counting.
Incorrect code placement can also cause duplication. For instance, placing a "Purchase" event in your website's global header instead of a specific confirmation page might trigger the event on every page load. Meta flags this as a "Redundant Purchase Events" error when it detects four or more purchase events for one transaction.
To fix this:
Check if the same Pixel ID and event name are being sent more than once.
Audit your header code to ensure only the Meta Pixel Base Code (with the
PageViewevent) is present.Move event-specific scripts, like "Purchase" or "Lead", to the confirmation page's body.
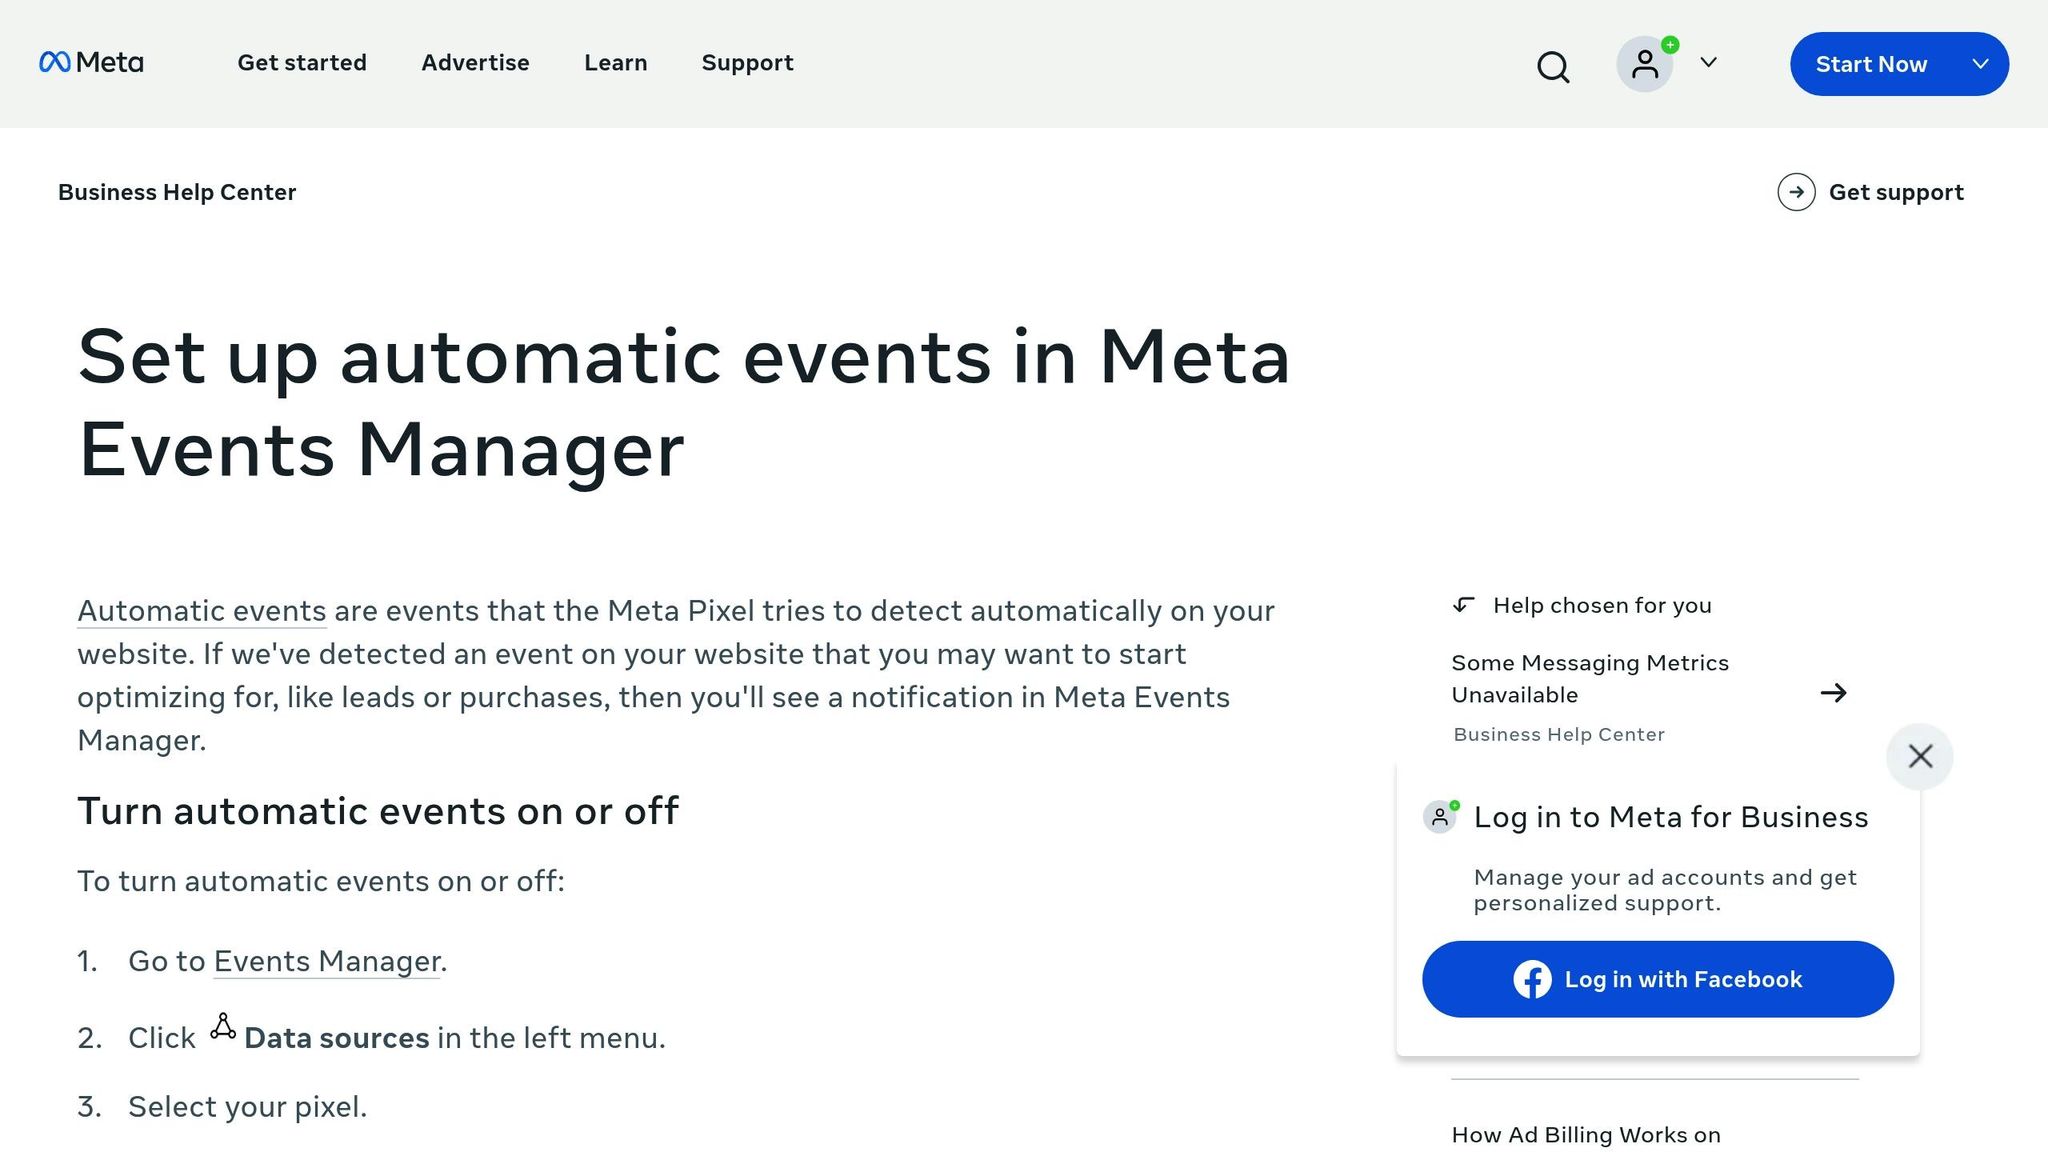
If you’ve manually installed event code, disable Automatic Events in Events Manager to avoid redundant tracking.
Cause of Duplication | Identification Method | Solution |
|---|---|---|
Pixel + CAPI Overlap | Events Manager (Deduplication %) | Use unique |
GTM & Manual Conflict | Meta Pixel Helper (Multiple IDs) | Remove one instance of the Pixel ID |
Automatic Events | Events Manager Diagnostics | Disable automatic tracking in settings |
Header Placement | View Page Source / Pixel Helper | Move event code to specific page bodies |
Redundant Purchases | Events Manager "Redundant Purchase" Error |
Now, let’s move on to fixing invalid IDs and parameters.
Correcting Invalid Pixel IDs and Parameters
An invalid Pixel ID error occurs when the ID in your website code doesn’t match any ID in Meta’s system. The Pixel Helper will flag this with a red error. To fix it, copy the correct Pixel ID from the Data Sources section in Events Manager, then ensure it matches exactly in both the fbq('init', 'ID') function and the <noscript> image tag in your site’s header.
Other common issues include currency and value parameter errors. Meta requires a three-letter ISO currency code like USD or GBP - not symbols like "$" or abbreviations like "US." The value field should only contain a decimal number (e.g., 10.00) without currency symbols, letters, or commas. For example, $99.99 or 99,99 would be flagged as invalid.
Event name mismatches are another frequent problem. Meta’s standard events are case-sensitive, so using "purchase" instead of "Purchase" could prevent the event from being recorded properly as a standard action.
To resolve these:
Check the "See affected URLs" list in Events Manager's Diagnostics tab to find pages with formatting issues.
Update the event code to match Meta's standard list (e.g.,
AddToCart,InitiateCheckout,Purchase).Clear your website’s cache after updating the code to ensure the new script loads correctly.
Once these are addressed, you can focus on resolving browser and ad blocker issues.
Resolving Browser and Ad Blocker Issues
Ad blockers and strict browser settings can prevent the Meta Pixel from loading, resulting in an ERR_BLOCKED_BY_CLIENT error. Since browser-based tracking relies on cookies to match visitors to Facebook accounts, blocking cookies disrupts tracking.
To minimize these issues:
Place the Pixel base code high in the
<head>section of your HTML. This ensures the script executes quickly and reduces the chances of interference from other scripts or browser settings.If your site uses a cookie consent banner, configure the Pixel to fire only after users give consent using Meta Consent Mode. Without consent, no data will be collected.
For strict corporate firewalls, whitelist the Meta Pixel’s domain in your firewall logs.
Use the Meta Pixel Helper to identify "Pixel Did Not Load" errors caused by client-side blocking.
For a more reliable tracking method, consider setting up the Meta Conversions API alongside your browser Pixel. Unlike browser-based tracking, server-side tracking through the Conversions API bypasses ad blockers and privacy settings, making it ideal for capturing high-value events like purchases.
Solutions for Pixel Tracking Failures
Meta Pixel vs Conversions API: Tracking Methods Comparison
When your Meta Pixel isn't capturing data, it's time to take action. Fixing this issue typically involves three main steps: ensuring you properly use the Meta Pixel and place the code correctly, using server-side tracking with the Conversions API, or managing pixels through Google Tag Manager. Here's how to address these problems and get your tracking back on track.
Placing Pixel Code Correctly
The Meta Pixel base code needs to sit between the opening and closing <head> tags on every page of your website. This placement allows the script to load early, reducing the chances of interference from third-party scripts or browser settings. It's important to keep only the base code in the header. This includes the automatic PageView event. For standard event codes like Purchase or CompleteRegistration, these should only be added to specific pages where those actions occur - such as a "Thank You" or order confirmation page.
If you mistakenly place a purchase event in the global header, it might fire on every page load, leading to Meta flagging it as a Redundant purchase events error when it detects multiple purchase events for a single transaction.
Double-check that the Pixel ID matches in both fbq('init', 'ID') and the <noscript> tag as shown in Events Manager. You can use the Meta Pixel Helper to verify the setup. Also, ensure the domain setting in Events Manager aligns with your live site URL. Even small discrepancies, like "www." versus "non-www", can disrupt tracking.
For better data accuracy, consider integrating the Conversions API alongside your Pixel.
Setting Up Conversions API
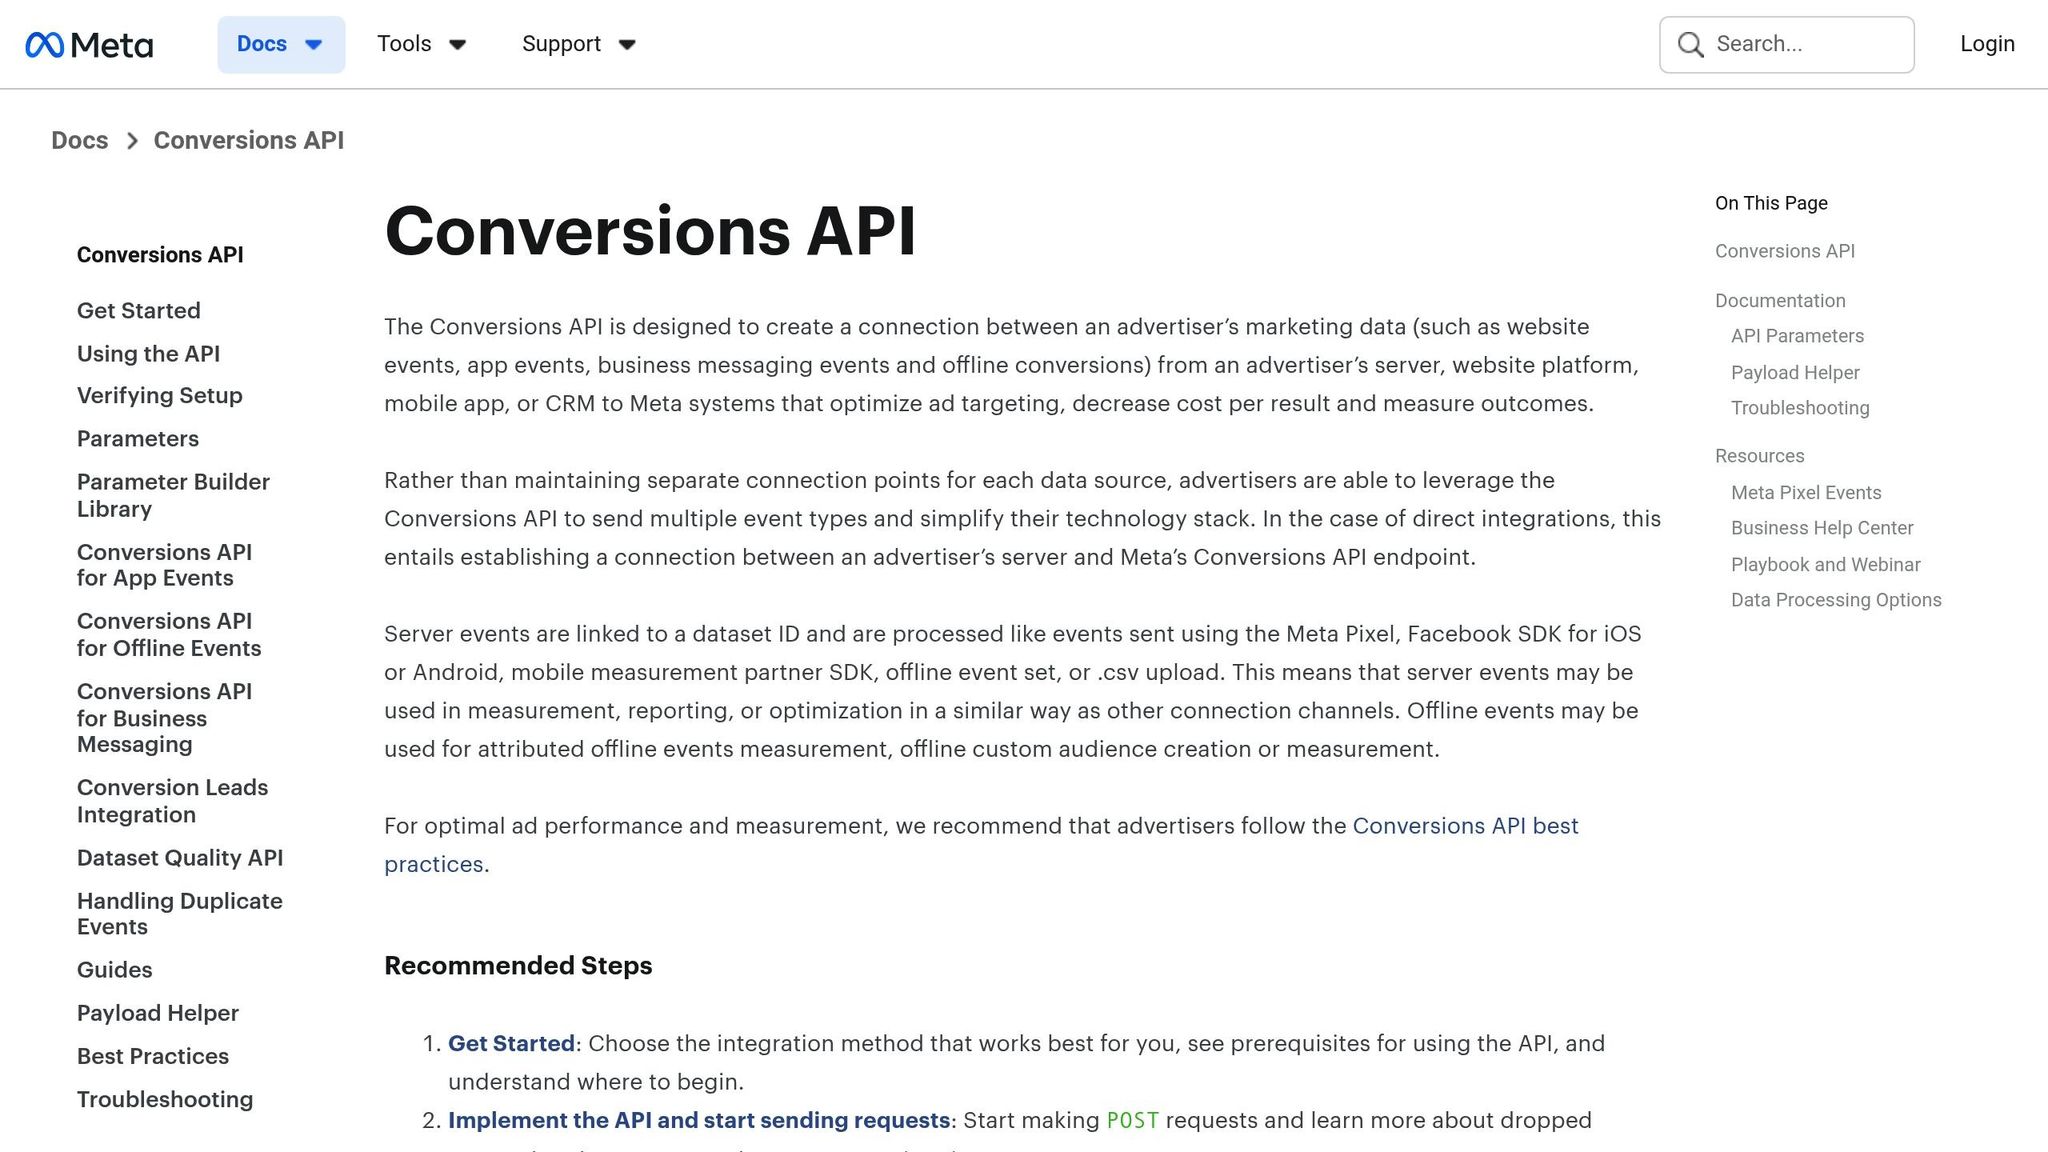
The Conversions API (CAPI) sends event data directly from your server to Meta, bypassing browser-based limitations like ad blockers, privacy settings, or browser crashes. To maximize tracking reliability, use both the Pixel and CAPI together, with CAPI acting as a fallback for events the browser might miss.
When using both methods, deduplication is key. Assign the same unique event_id to each event sent by the Pixel and CAPI to ensure Meta counts it only once. Without this step, you could inflate your conversion numbers, leading to inaccurate return on ad spend (ROAS) calculations.
Meta uses an Event Match Quality (EMQ) score, ranging from 1 to 10, to assess how well your customer data (like hashed email, phone, and city) matches events to a Meta account. A score of 6.0 or higher is ideal for the best results. Sending events as close to real time as possible helps Meta optimize your campaigns more effectively.
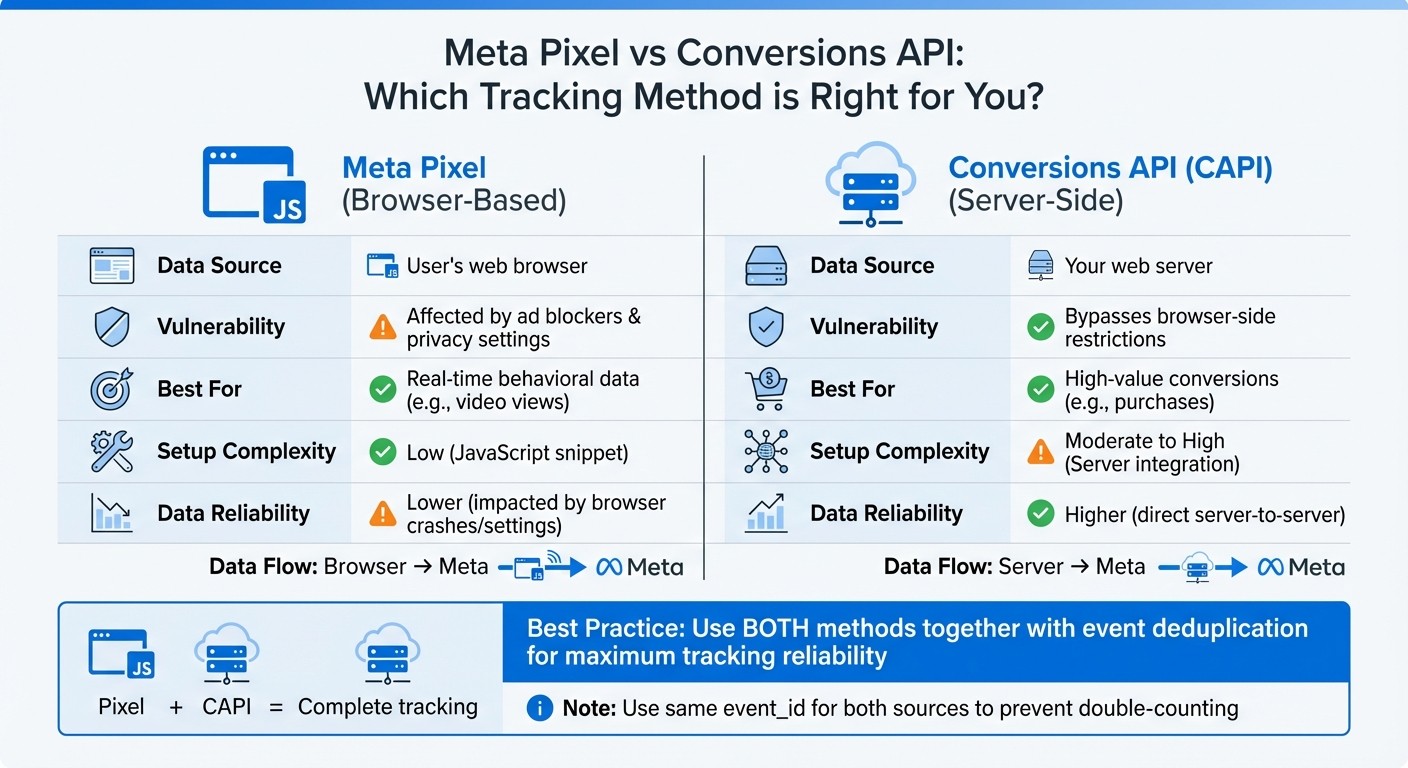
Feature | Meta Pixel | Conversions API (CAPI) |
|---|---|---|
Data Source | User's web browser | Your web server |
Vulnerability | Affected by ad blockers and privacy settings | Bypasses browser-side restrictions |
Best For | Real-time behavioral data (e.g., video views) | High-value conversions (e.g., purchases) |
Setup Complexity | Low (JavaScript snippet) | Moderate to High (Server integration) |
Data Reliability | Lower (impacted by browser crashes/settings) | Higher (direct server-to-server) |
If you're managing multiple tags or want a more streamlined setup, Google Tag Manager can simplify things.
Managing Pixels with Google Tag Manager
Google Tag Manager (GTM) offers a centralized way to manage tracking, making it easier to deploy and update your Meta Pixel without diving into site code. This reduces the risk of syntax errors and simplifies handling multiple tags across your website.
To ensure the Meta Pixel loads early enough to capture visitor actions, place the GTM container snippet in your website's <head> section. If the pixel still doesn't fire after being set up in GTM, test the configuration on a simple page. This will help you determine whether the issue lies with GTM itself or with a specific tag configuration.
Using AI Tools to Simplify Pixel Troubleshooting
Checking the health of your pixels manually across multiple campaigns can quickly become a tedious task. Thankfully, AI-powered tools have stepped in to automate this process, identifying tracking errors and offering actionable suggestions. These tools don't just complement manual diagnostics - they make pixel troubleshooting and overall campaign management far more efficient.
How AdAmigo.ai Identifies Pixel Problems
AdAmigo.ai, a trusted Meta Business Technology Partner, takes the guesswork out of pixel troubleshooting. It automatically audits ad accounts to detect duplicate events, missing parameters, or misattributed data, ensuring your Meta pixel data sync is always on point.
The platform’s AI Chat Agent brings instant clarity to complex issues. You can ask questions like, "Why did my conversions drop yesterday?" or "How do I fix mapping Purchase events?" and get precise, data-backed answers. It even helps bridge the gap by tracking Meta Ads with Google Analytics, pinpointing whether problems lie in pixel configuration or data attribution.
For those who prefer a hands-off solution, the Autopilot mode is a game-changer. It uses real-time event data to fix issues automatically, ensuring your campaigns stay optimized - even after hours.
Campaign Optimization Beyond Pixel Tracking
AdAmigo.ai doesn’t stop at troubleshooting pixels - it takes campaign performance to the next level. While maintaining pixel health is essential, it’s just one piece of the puzzle. The platform handles everything from optimizing creatives and targeting to managing budgets and bids, offering a fully integrated solution.
Its AI Ads Agent makes launching campaigns effortless. With just one click, it generates creatives, sets up campaigns, and monitors pixel data to ensure accurate event tracking throughout. This holistic approach ensures that every aspect of your campaign works in harmony.
Benefits of AI-Powered Troubleshooting
Streamlined pixel troubleshooting lays the foundation for better campaign results. For agencies, AdAmigo.ai allows a single media buyer to handle 4–8 times more clients by automating routine tasks, freeing senior strategists to focus on big-picture planning. In-house teams can save on hiring costs by relying on an AI media buyer that works 24/7 and continuously improves.
Users report impressive results. The AI Chat Agent can cut manual troubleshooting time by up to 50%, while account audits can boost ad delivery optimization by as much as 20%. Features like AI Actions provide a prioritized daily list of tracking issues - such as missing value parameters or Purchase events that aren’t firing - so you can address them without delay.
As Jakob K., a G2 Reviewer, put it:
"The fact that you can launch campaigns through text or voice commands feels like magic! It handles everything from creating lookalike audiences to adjusting budgets."
AdAmigo.ai offers a smart, cost-effective alternative to hiring a dedicated media buyer, delivering round-the-clock monitoring and optimization that’s tough for any human team to match.
Conclusion
Resolving Meta Pixel issues is key to protecting your ad budget and enhancing Meta's optimization capabilities. When your pixel functions properly, it collects precise conversion data, enabling smarter bidding strategies, better audience targeting, and ultimately, a stronger return on ad spend (ROAS). Without reliable tracking, you risk spending money on audiences that simply don’t deliver results.
Accurate pixel tracking leads to more precise bidding and audience segmentation. Tools like the Meta Pixel Helper and Events Manager diagnostics are invaluable for identifying and fixing most issues quickly. This combination ensures that every conversion is accounted for, even when integrating Meta Ads with GA4, even when privacy settings create challenges. This is particularly critical for AI-powered retargeting, where data accuracy directly impacts performance.
For those managing multiple campaigns or accounts, automation becomes a game-changer. Automated troubleshooting tools, such as AdAmigo.ai, can monitor your pixel’s performance and flag critical issues like missing purchase events or duplicate firing. As Rochelle D., a G2 reviewer, put it:
"We are getting INSANE RESULTS! Our budgets are controlled, our spend is being smartly allocated and our ROAS is up massively. Agencies charging 7 times the cost of AdAmigo have been put to shame quite frankly!"
This automated approach not only answers pressing questions like "Why did my conversions drop?" but also implements fixes to keep your campaigns running seamlessly. Whether you opt for manual monitoring or rely on AI-driven tools, staying proactive with a pixel management checklist ensures your campaigns stay on track. By addressing tracking issues promptly, you can make every ad dollar count and achieve consistent success in your advertising efforts.
FAQs
How do I stop my Meta Pixel from firing multiple times on my website?
To ensure your Meta Pixel doesn’t fire multiple times, make sure the base pixel code is added to your page only once. Place the JavaScript snippet either in the <head> section or just before the closing </body> tag. Avoid duplicating the code in theme files, plugins, or tag managers. If you’re using a tool like Google Tag Manager, set up a single tag to fire across all pages and disable any hard-coded pixel implementations to prevent overlaps.
Once your setup is cleaned up, use the Meta Pixel Helper Chrome extension to verify that only one pixel is firing per page. This tool displays the number of detected pixels directly on its badge, making it easy to identify duplicates. For even better accuracy, include a unique event_id for each conversion and enable the Conversions API, which can automatically manage and remove duplicate events.
If you’re looking for an extra layer of assistance, tools like AdAmigo.ai can scan your site for duplicate pixel tags. They even offer one-click fixes, helping you save time and keep your pixel setup streamlined.
How can I troubleshoot issues with my Meta Pixel setup?
To tackle Meta Pixel issues effectively, start by using the Meta Pixel Helper - a free Chrome extension that scans your web pages for problems like missing or duplicate pixels. It also provides detailed error messages for each event, giving you a clear idea of what needs fixing. For a more comprehensive analysis, head over to the Meta Events Manager in your Meta Ads account. The Diagnostics tab pinpoints errors such as missing parameters, while the Test Events tab lets you simulate conversions in real time to ensure everything is working as expected.
If you're leveraging server-side tracking, the Conversions API troubleshooting guide is a must. It helps verify data accuracy by checking payloads, identifying duplicate events, and testing API functionality. For added convenience, tools like Google Tag Manager or AI-driven solutions such as AdAmigo.ai can simplify the process. AdAmigo, for instance, offers automated audits and actionable fixes, so you can fine-tune your pixel setup without needing any coding skills. By combining these tools, you can ensure precise tracking and dependable conversion data.
What makes the Conversions API more reliable than the Meta Pixel for tracking?
The Conversions API offers a more dependable way to track events by sending data directly from your server, sidestepping browser-based hurdles like cookies and ad blockers. This method ensures a steadier flow of information compared to the Meta Pixel, which depends on JavaScript and cookies to monitor user activity.
With the Conversions API, you can minimize data loss, enhance attribution accuracy, and maintain effective tracking even as privacy regulations and technologies change. This helps you make smarter decisions for your Meta ad campaigns.